Downloading the Print Driver
Before you are able to print, you may have to download and install updated device drivers.
1. From your web browser, navigate to http://www.office.xerox.com/multifunction-printer/color-multifunction/workcentre-6400/enus.html.
Note: If you are still running Mac OS X 10.7 (Lion), ignore the following steps. A unique version of the driver must be downloaded and installed through Apple’s Mac App Shop.
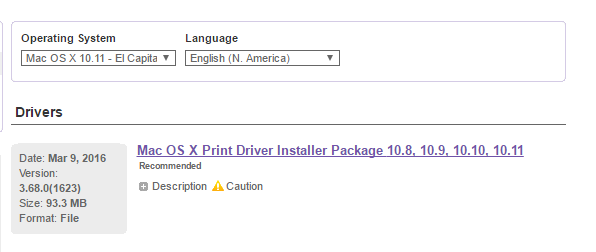
2. From the menu at the right side of the screen, click [Drivers and Downloads]
3. Ensure that the correct version of Mac OS X is selected in the [Operating System] dropdown menu. Download and mount the .DMG image that is provided.
4. When the folder for the mounted image opens, double-click the .PKG file that is contained inside to launch Xerox’s installer.

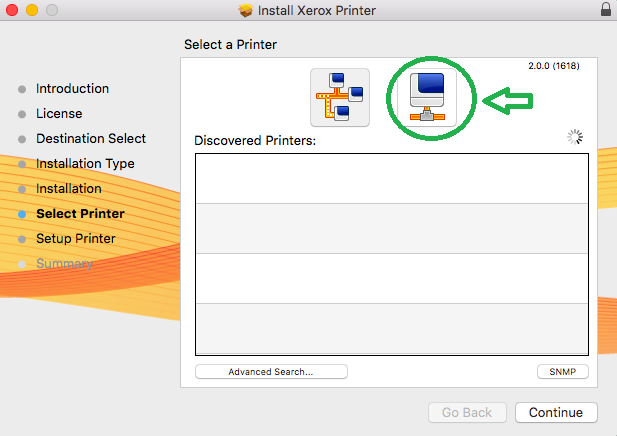
5. Follow the onscreen instructions. At the [Select Printer] screen, click the icon on the right hand side. In the [IP Address or DNS Name] field that appears, enter wc6400.botany.ubc.ca for the printer in the Biological Sciences Building or beatywc6400.botany.ubc.ca for the printer in the Beaty Biodiversity Research Centre. Click [Continue].
6. Click [Close] to finish.
Configuring the Print Driver
1. From any program, open a document that you would like to print.
2. In the Print dialogue, select [WC6400] or [Beaty WC6400] from the [Printer] dropdown menu.
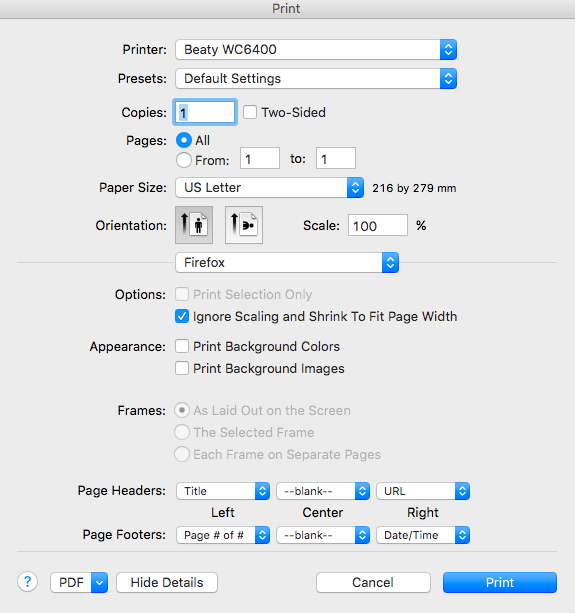
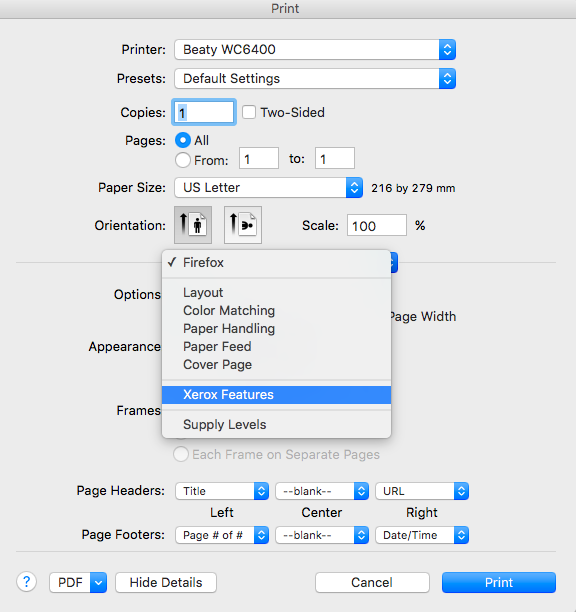
3. From the print options dropdown menu (see screenshot), select [Xerox Features].
4. Select the [Advanced] option.
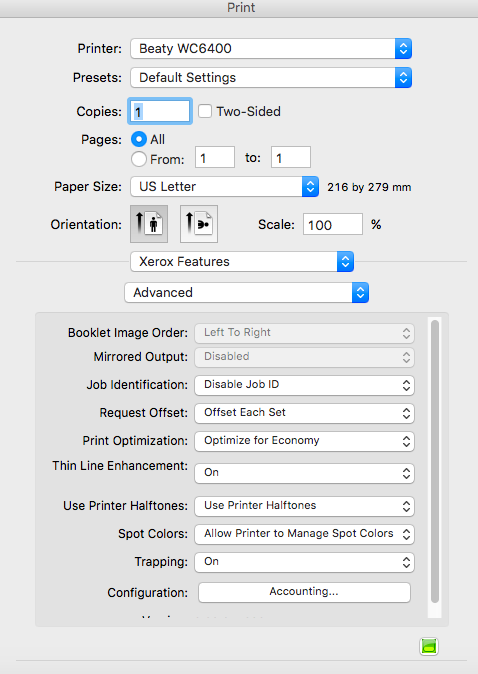
5. Click the [Accounting] button that appears.
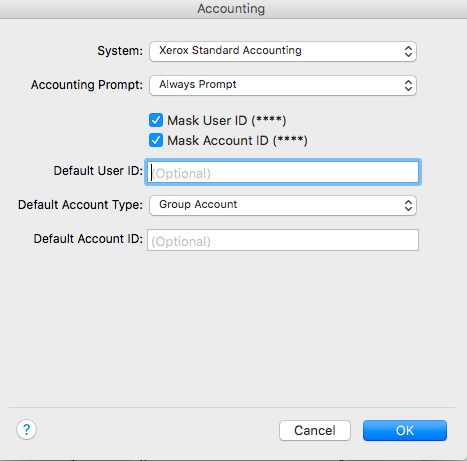
6. From the [System] dropdown menu, select [Xerox Standard Accounting].
7. If you are sharing a public computer with other users, select the [Always Prompt] option. Tick off [Mask User ID] and [Mask Account ID]. Click [OK] to save your settings.
An [Accounting] pop up window will appear every time you send a print job to this printer. Enter your 7 digit employee number under [User ID], select [Group Account] under [Account Type], and then type in your four letter SpeedChart (all upper case) under [Account ID]. Your print job will be sent to the printer once you click [OK].
If you are using a private PC and single account ID for all print jobs, select [Do Not Prompt] under [Accounting Prompt]. Enter your 7 digit UBC employee number under [Default User ID] and select [Default Group Account] under [Default Account Type]. Finally, click [OK] to save the settings.
In this case, no pop up window will show up when you send a print job to this printer. All print jobs will be charged to your Default account.
If you are using a private PC but have multiple account IDs for different print jobs, select [Always Prompt] under [Accounting Prompt]. Tick off [Mask User ID] and [Remember Last Entered Codes]. Untick [Mask Account ID]. Enter your 7 digit UBC employee number under [Default User ID] and click [OK] to save your settings.
A pop up window will appear every time you send a print job to this printer. When printing, select [Group Account] under [Account Type] and enter the appropriate SpeedChart (all upper case) under [Account ID]. Your print job will be sent to the printer once you click [OK].
8. At the Print dialogue, select [Save Current Settings as Preset] from the [Presets] dropdown menu.
9. Set the [Preset Name] to wc6400 or beatywc6400 and click [OK].
